
Fall Through Thanksgiving Table Centerpiece
Well, it officially feels like fall here.
After the deluge of the past several days, the sun is out (no joke, it’s been two weeks since we’ve had sun here in coastal NC), and it’s a delightful 69 degrees with very comfortable humidity. My windows are open, and the cool breeze is just what the doctor ordered to recover from the past two weeks and to put my mind in fall mode.
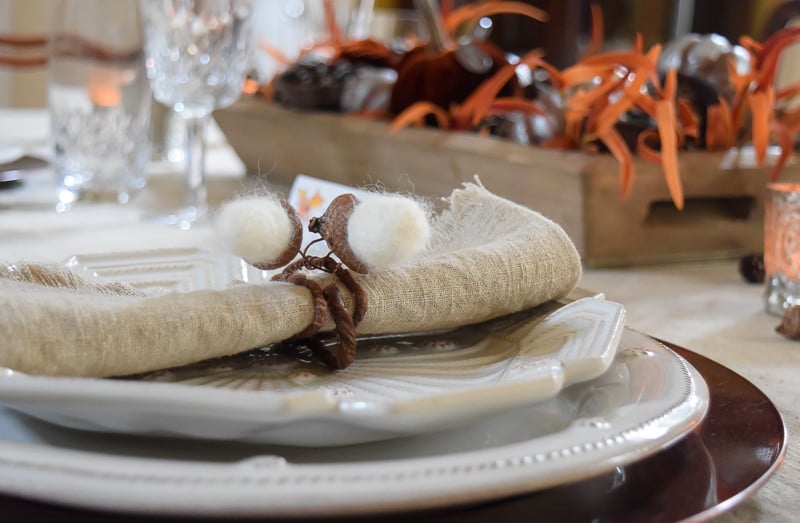
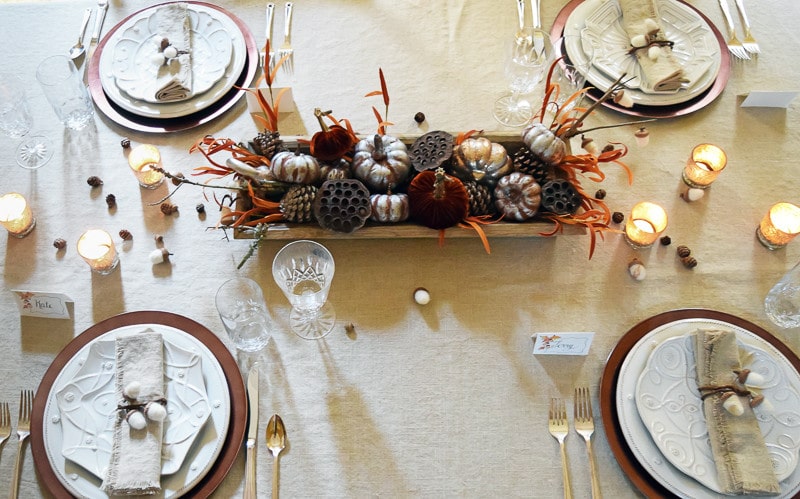
So, to that end, I want to share with you my Fall through Thanksgiving table centerpiece. My centerpiece this year is holding together what my linen tablecloth and felted acorn napkin rings started and is staying with neutral/fall colors with a metallic dash for extra zing.
One of the items I worked into and throughout my table setting was the copper color from my chargers. Truth time, these chargers cost me less than a dollar each at Michael’s Arts and Crafts recently, but I love the color and the feel that they give my table. So when it came time for my centerpiece, weaving that copper color into it was key. I accomplished this with my silver glazed pumpkins, as well as the little velvet pumpkins. The velvet pumpkins were a bit of a splurge, but I rationed that my $1 chargers and my recycled plastic pumpkins more than offset that extravagance.
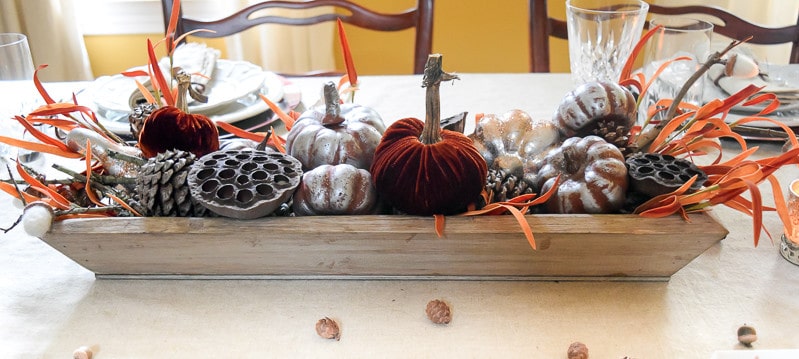
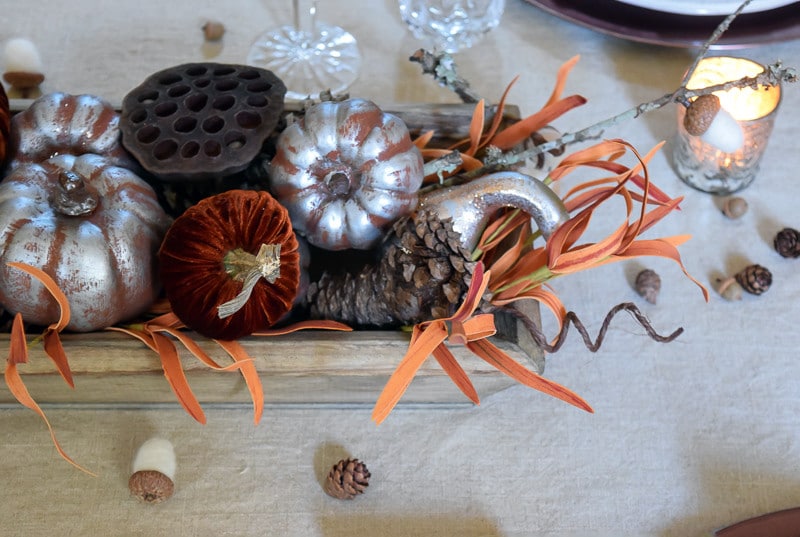
So, here’s what’s in my Centerpiece:
- 2 Velvet Posh Pumpkins in Bittersweet
- 4 branches of gold/orange silk leaves, which I took apart. They were cleverly called “Fall Foliage Bundles” at Michael’s and were a bargain at $1.29 a pop.
- Dried Lotus Pods. These came 3 to a bundle at Michael’s.
- Pinecones from my yard
- Silver Glazed Pumpkins (see below)
- 2 branches onto which I wired some wool felted acorns.
- I spiraled some of the raffia wire that I use for the napkin rings.
Putting the centerpiece together was very easy. I filled the base with plain pinecones and then placed the more ornamental items on top, jabbing the fall foliage in a couple of places, along with the branches and the twirled raffia wire.
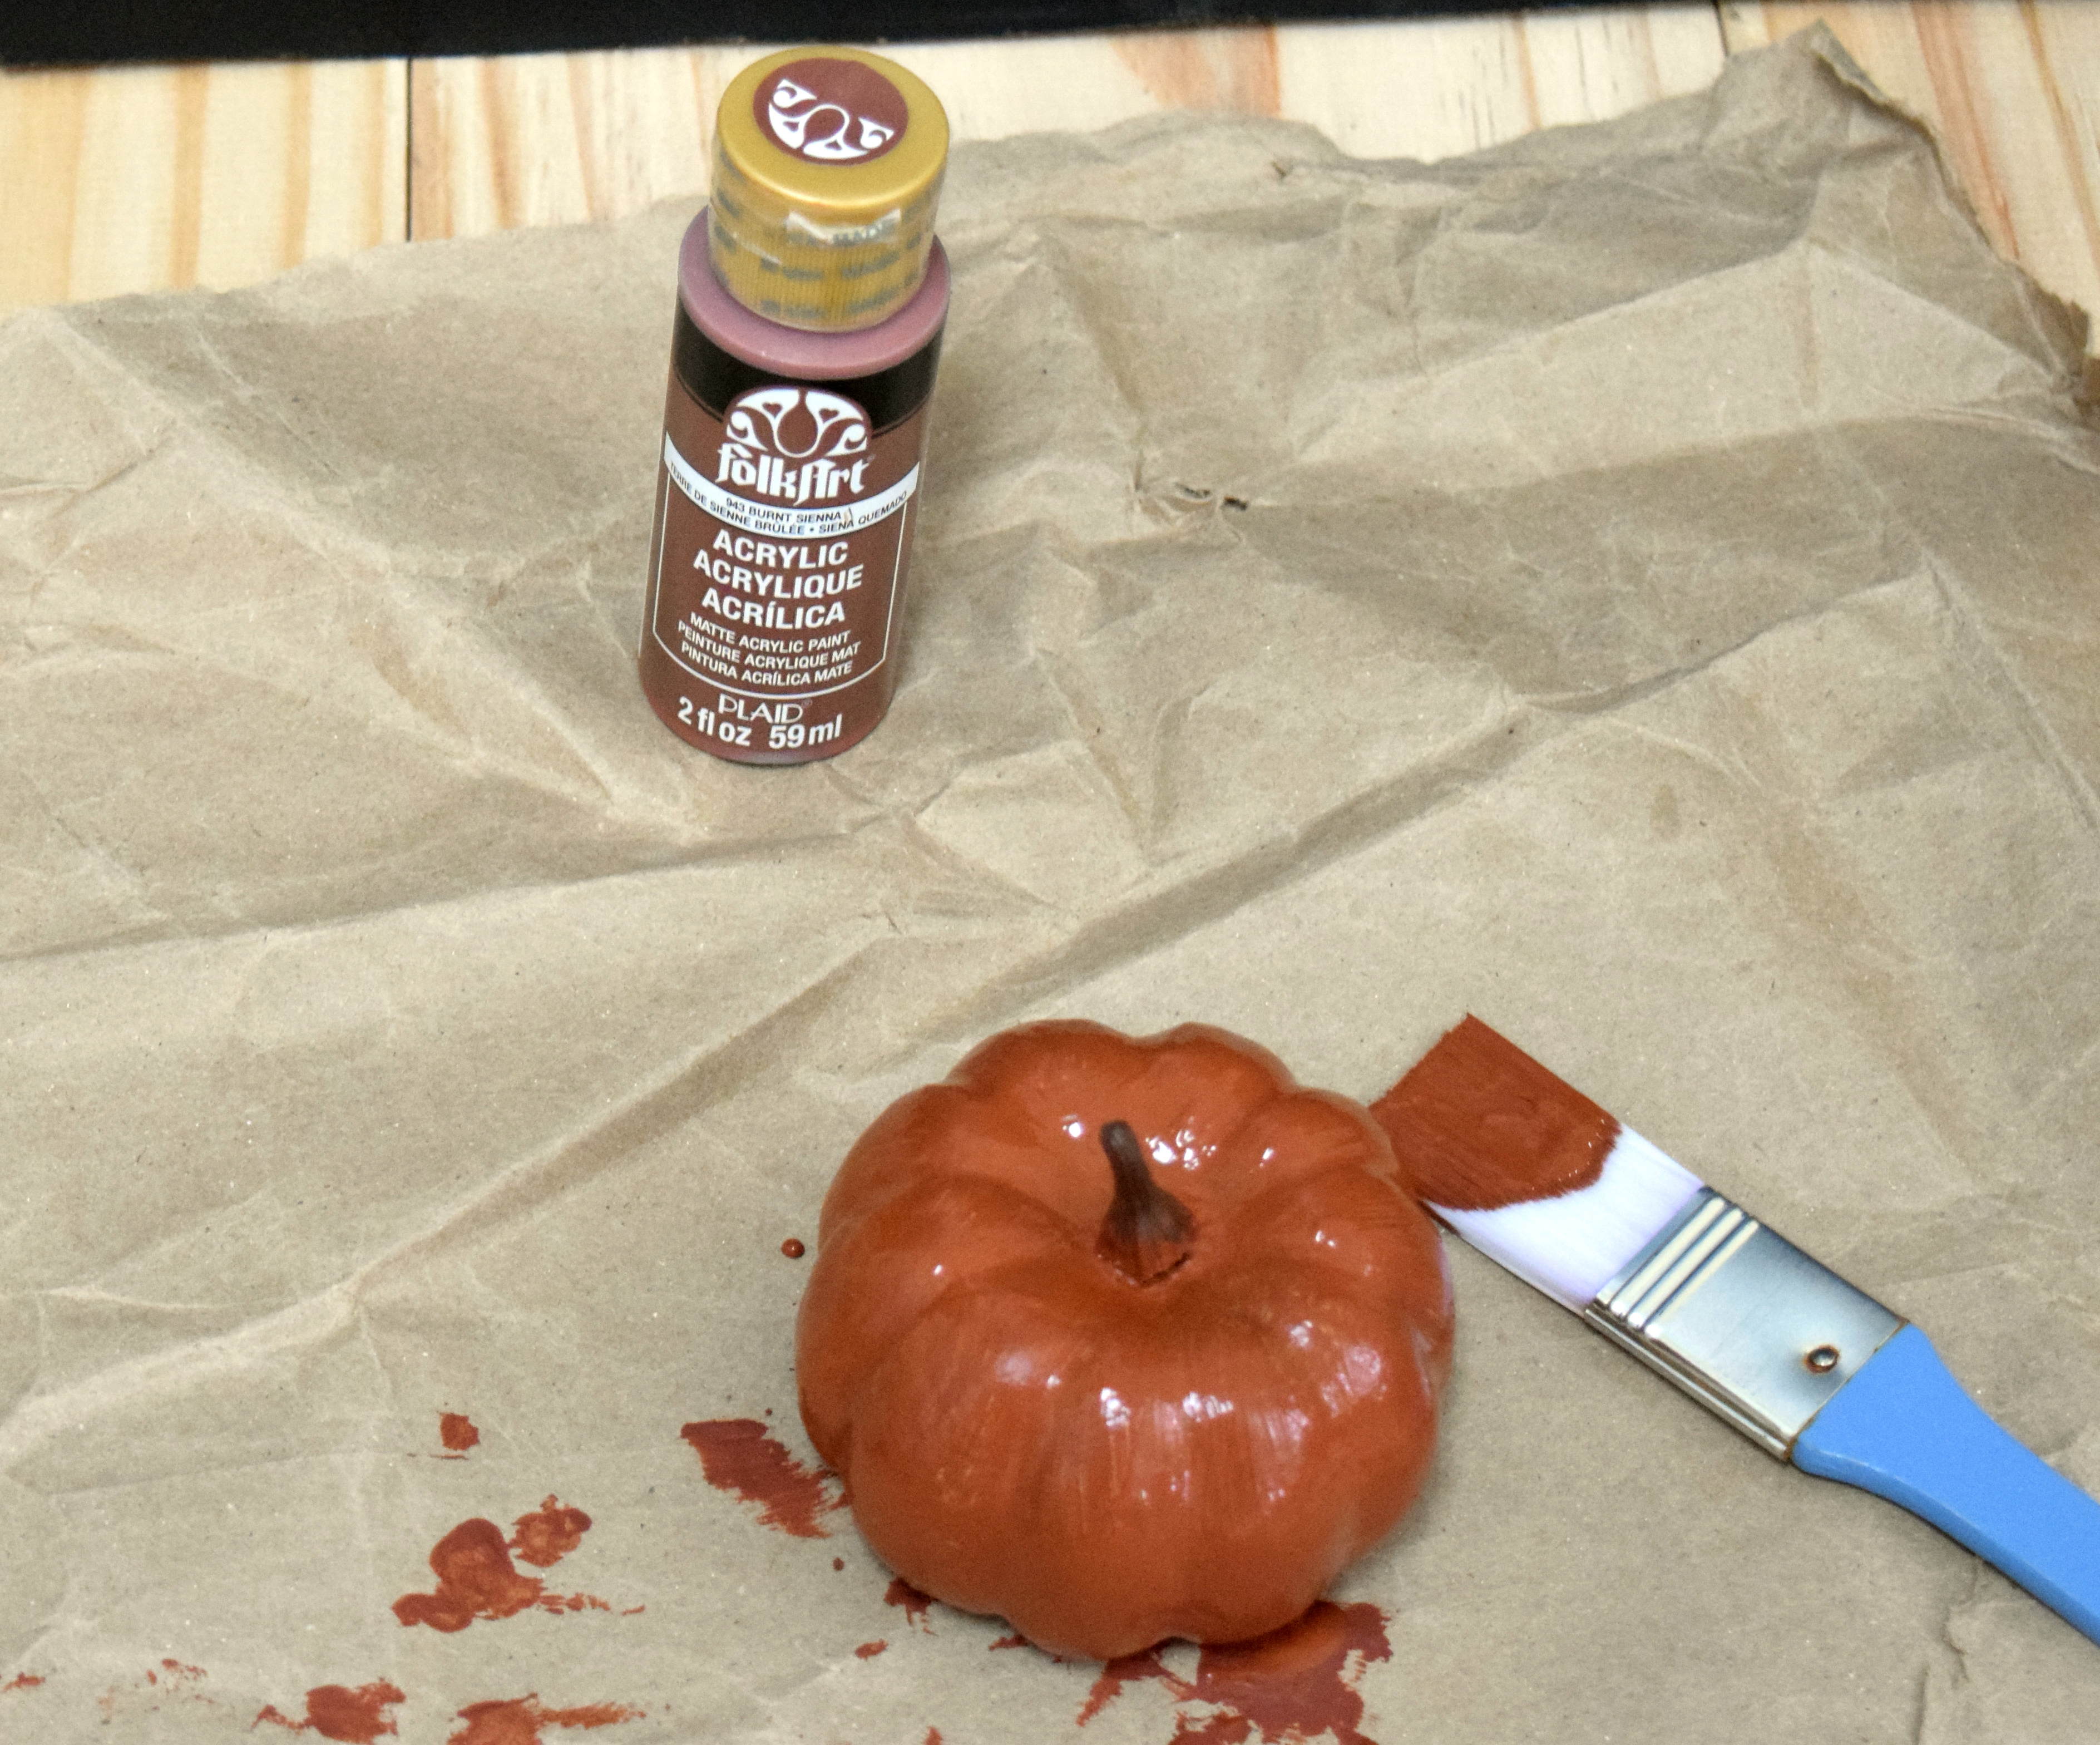
To Make the Silver Glazed Pumpkins:
- I scrounged through my attic rounding up a few of the little random pumpkins I had purchased over the years at The Dollar Store or Wal-Mart.

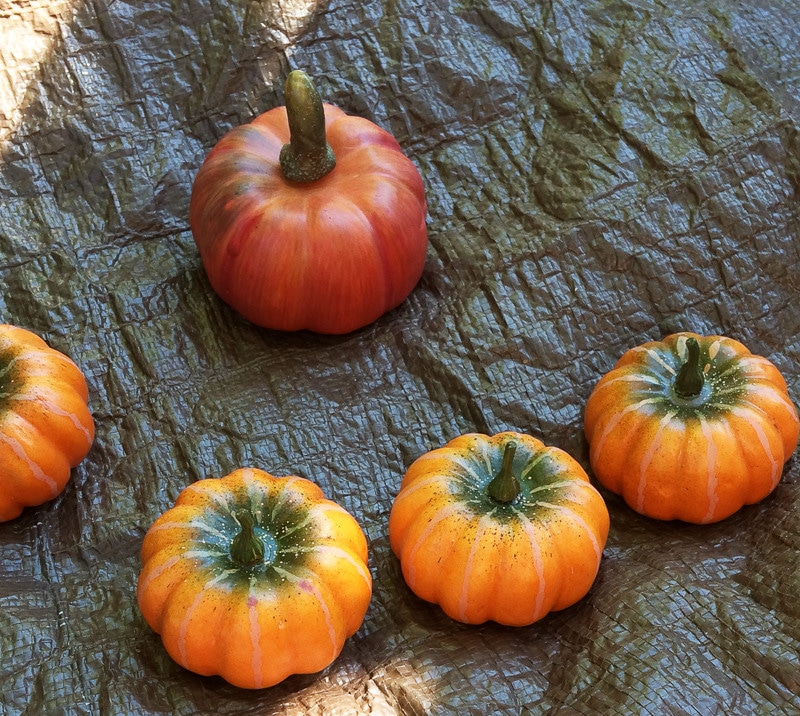
- After first painting them a true brown which didn’t do it for me, I went back and repainted them with a Burnt Sienna acrylic paint.

- Then I dry brushed them in silver acrylic paint, making sure there was very little paint on my brush and making sure that I went in all directions. By ‘dry brush’ I mean wipe as much paint off of your brush as possible so that you are just putting a little bit of glaze of the paint on your pumpkin. I stayed away from the crevices as much as possible as that’s where I wanted the copper to show through.
- Let them dry…easy Peasy Pumpkin Squeezy!
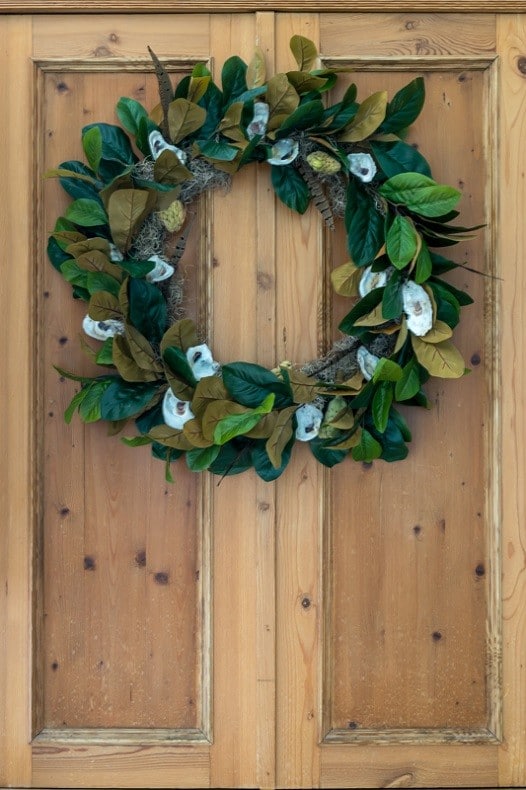
If you still need more fall decor ideas, check out my fall ‘open house’ with natural decor for more inspiration!
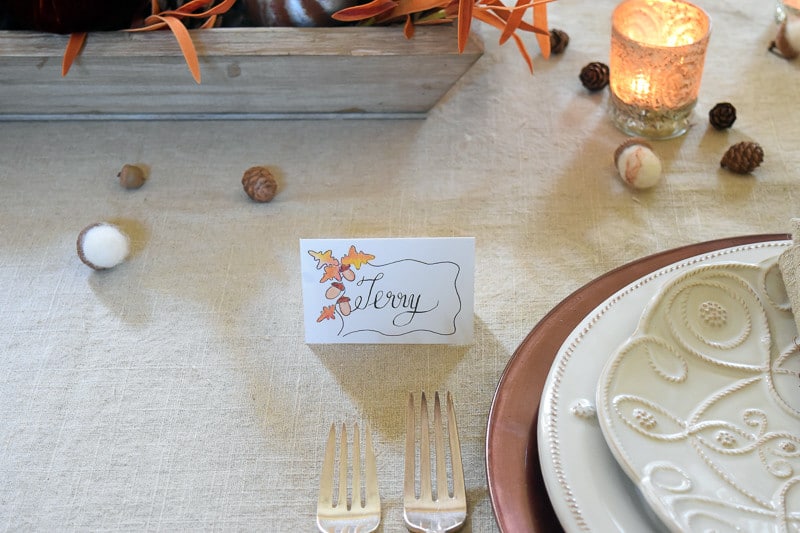
I’ll be back next week with a PDF for fall and Thanksgiving place cards. Until then, thanks for visiting and I hope you’ll come back soon. If you want to make sure you don’t miss future content, pop your email in the beige box up on the right. I usually send out 2 emails a week, so I won’t inundate your inbox.
Thanks again for spending a few minutes of your busy day with me today. Know that you are appreciated and that I welcome each and every comment that comes my way. If you want to make sure you don’t miss future content, pop your email in the beige box up on the right or click here. I usually send out 2-3 emails a week, so I won’t inundate your inbox…believe me, I’m sensitive to an overflowing email inbox!
Printables and knit patterns are available to all of my subscribers in the Subscriber Benefits Library. I will continue to add patterns and printables to this page as we go along.
So, if you’d like to get in on the ‘subscriber benefit’ action, simply subscribe to Nourish and Nestle using the form on the right sidebar. It’s towards the top a bit. I have sent all my subscribers the link to the Subscriber Benefits Library, but if you missed it or misplaced it, drop me a line.
Hugs,


I love the ide of a long skinny centerpiece for Thanksgiving. There isn’t room for anything else with all of the goodies at my family dinner. Thanks for sharing on the #HomeMattersParty this week. I hope you join us next week.
Thank you Audrey! The long skinny does make room for all the rest of the yummies! I’ll be back next week.
I love your centerpieces and just bought some small pumpkins over the weekend and hope to give this a try!
Thanks Mary…hope you have fun at it! Thanks for stopping by.
I love the pumpkins! I really need to get out my fall decor before winter strikes!
Get busy Andrea…Thanksgiving will be here before you know it!
Beautiful! Love how it all came together. Pinned for future inspiration.
Thanks for visiting Sarah! Enjoyed browsing around your site as well. And I’m coming back for suggestions as we have a freshman (or first year) at UNC this fall and so are always on the lookout for suggestion in that area.
thanks for sharing your lovely table. This is very timely for me. I have been trying to do a little decorating and broke it up into areas. My table is next on the list. I like the idea of your choices so it can be enjoyed for a while
Thanks Mary. I do like to keep my stuff up for a while, so this neutral-ish, not over the top turkey-filled tablescape, fit the bill for me. Have fun decorating your table! I’m going to pop over to see what you’re doing!
Have a great day!
Lynn
This is a beautiful tablescape and your pictures are awesome!
Thanks Sandra, really appreciate your kind comments, especially the one about my photography. Really trying to learn that ‘art’ and it’s not as easy as one would think! Heading over to check out your Chocolate Cakes!
Thanks for visiting
Lynn