
Using Rub’n Buff to update a light fixture
So, this is one of those posts where I tell you to ‘do as I say, not as I do’. I’ll get to that part of the story soon, but first, here’s the situation.
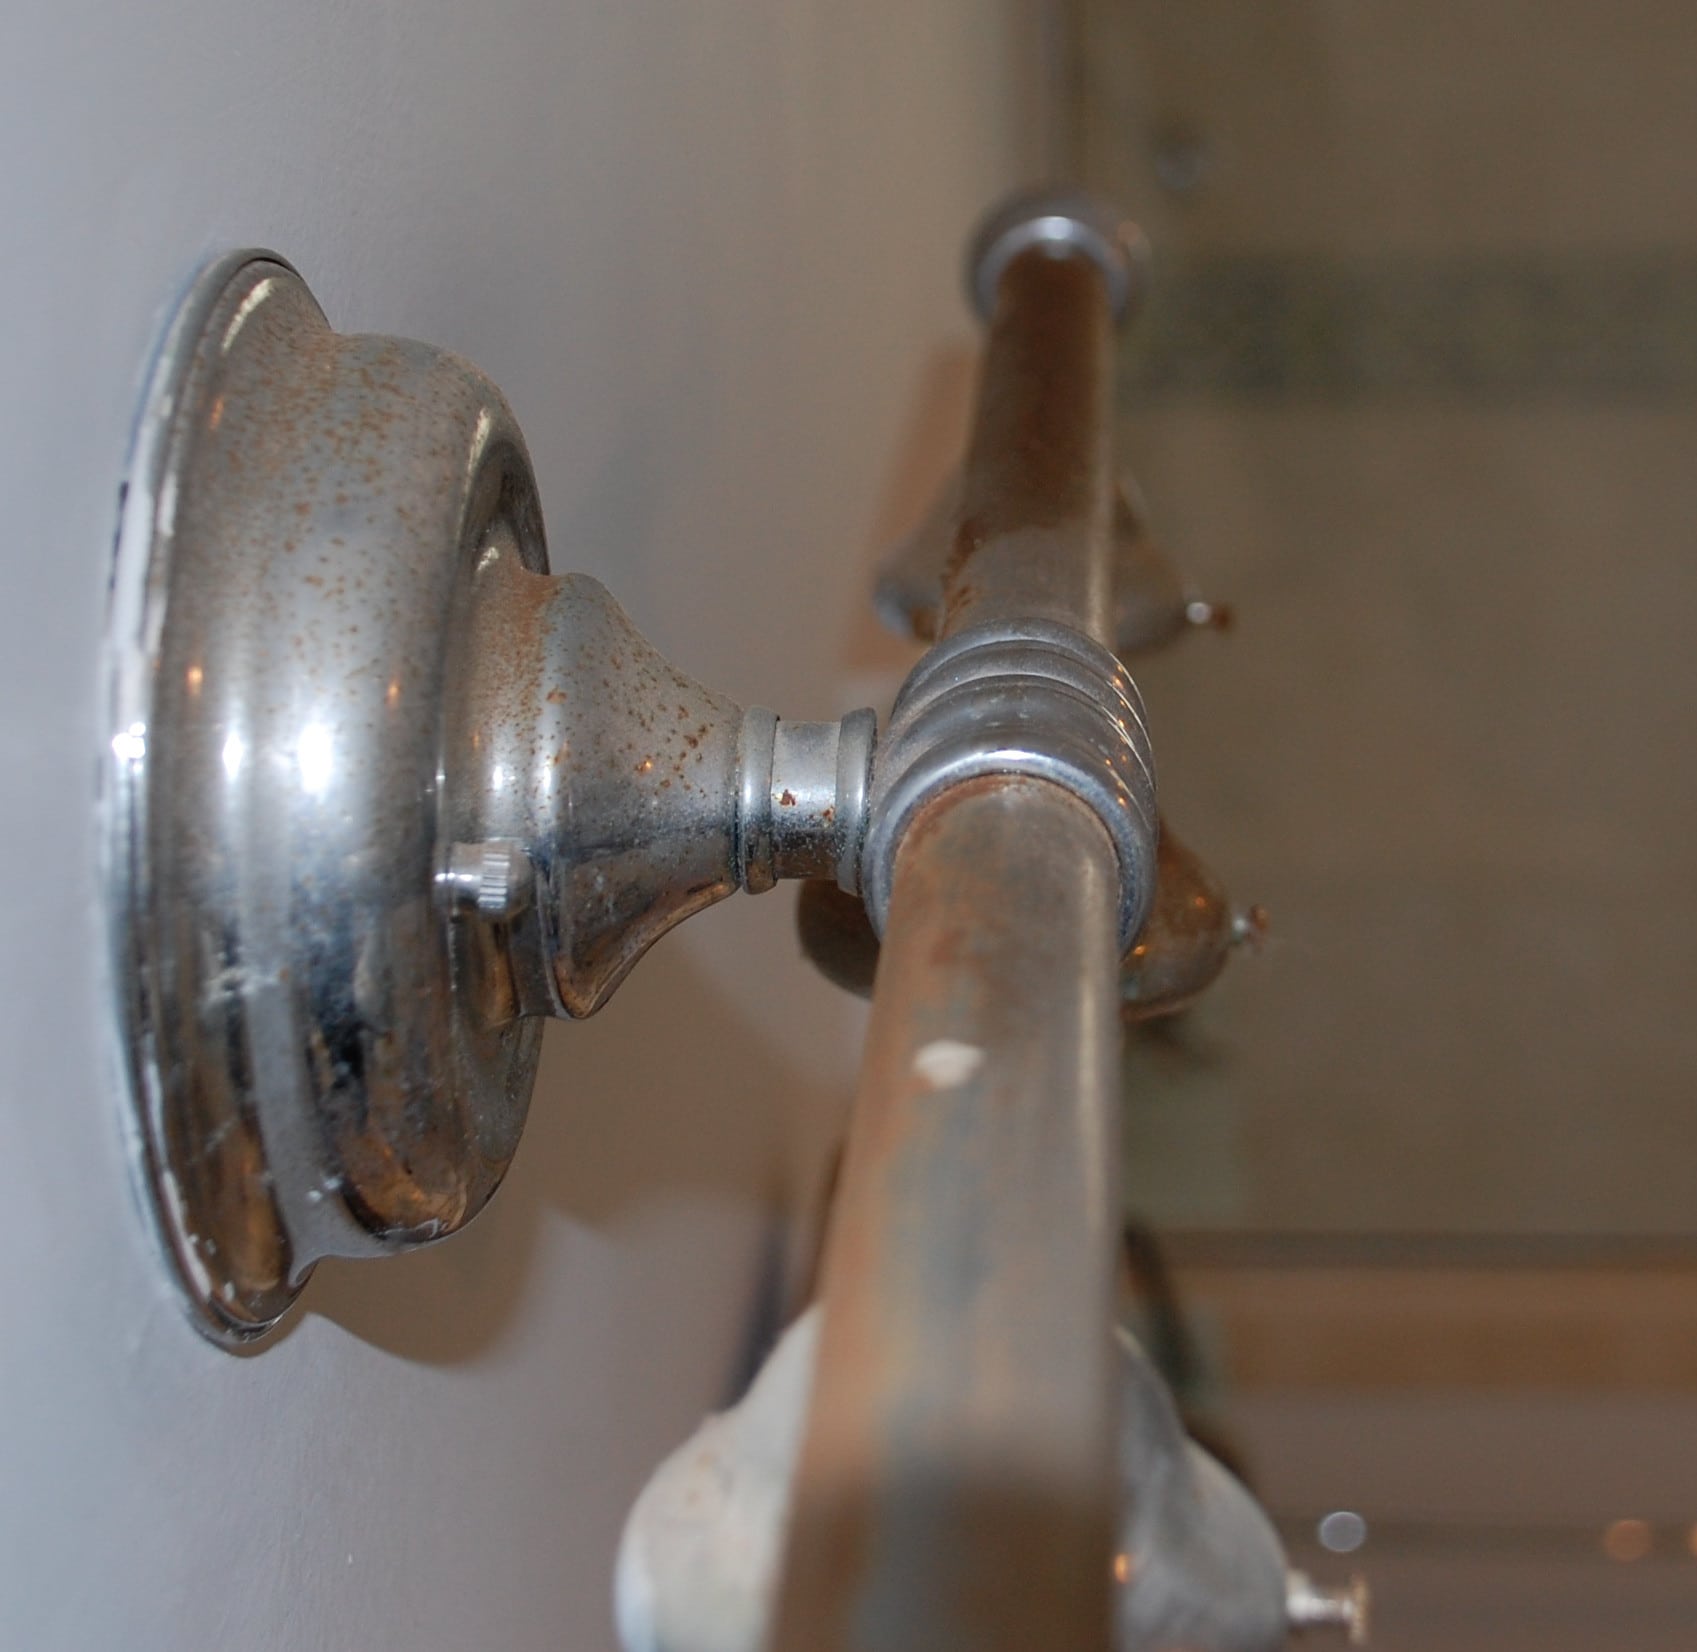
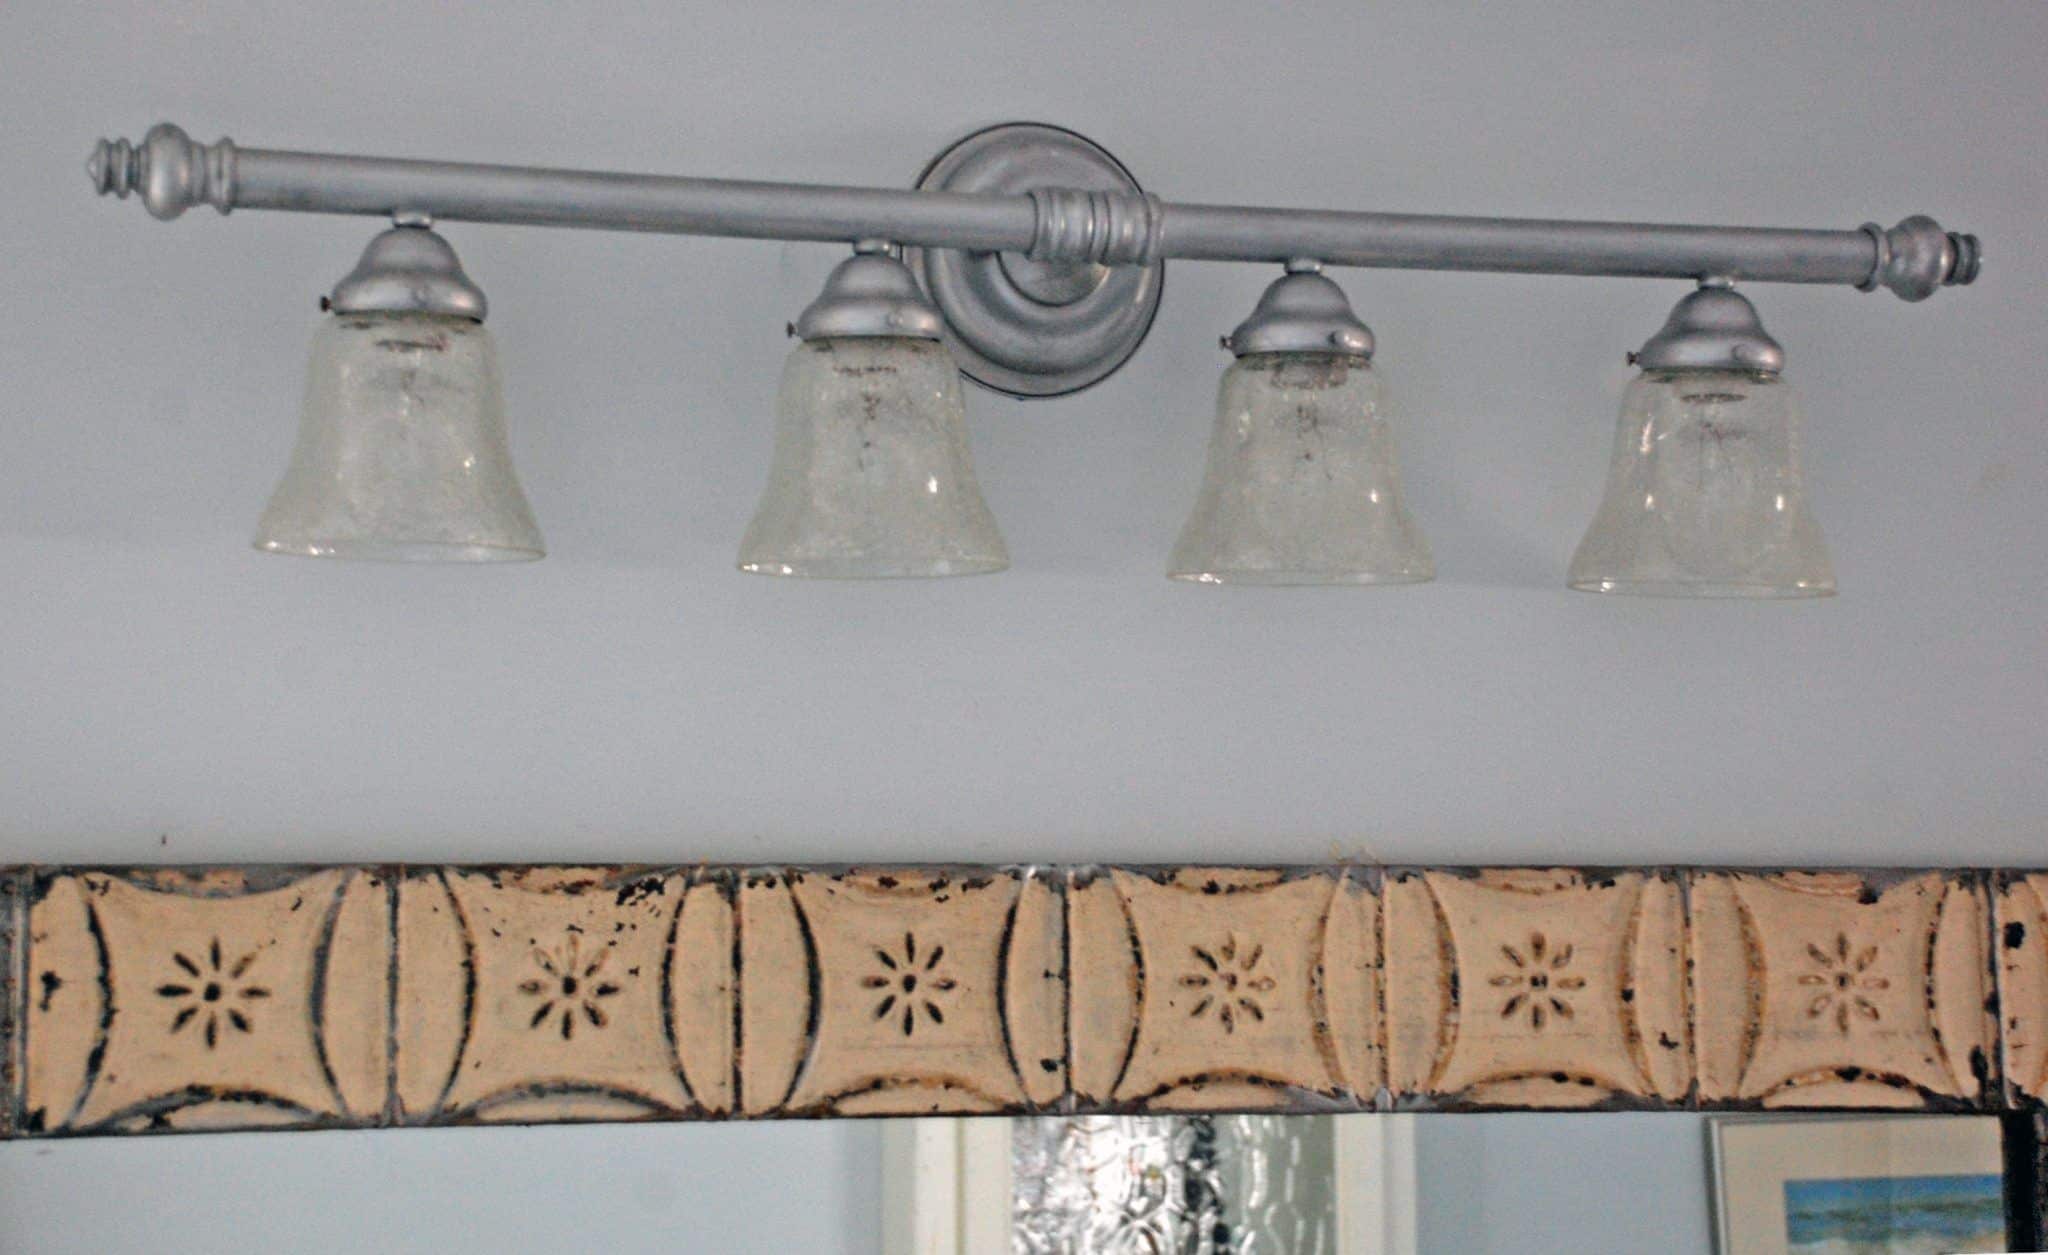
We have a light fixture in our Master Bathroom that started to show some rust. We do have a steam shower in there and I guess we weren’t as diligent as we should have been in using the exhaust fan. (We’re better now).
Anyway, the light fixture is up rather high and my husband never even noticed the rust, but I noticed it when changing the bulbs and it kinda bugged me. I’ve been pondering ways to cover up the rust for a year now, and recently realized that Rub’n Buff was my answer. I’ve used this product before and have been pleased with the results. Rub’n Buff is a metallic wax that comes in 12 colors and I’ve had great success with it on picture frames.
Some of these are affiliate links and I will earn a small commission off of the sale of these products, but the price you are charged is not affected. You can see my full disclosure policy here.
How I did it:
- I taped up paper behind and around the fixture. Rub’n Buff dries very quickly and if I got it on the wall, I knew it was there to stay.
- I needed to sand down the rusty areas, which was much easier than I thought. Here’s where the ‘do as I say, not as I do’ part comes in. I should have gone ahead and sanded, deglossed and/or primed the areas that weren’t rusty as well. It seems that Rub n’ buff needs to have a porous surface to adhere to and the sanding gives it that. In the areas that I didn’t sand/prime the surface, the product will rub off (not real easily, but if you take your finger and rub on it, you will get a little residue). I will say, in my defense, that I scoured the internet and all I read about Rub’n Buff is that it will adhere to just about anything, with no real prep needed. C’est la vie. Since this fixture is 8 feet off of the ground and won’t be touched at all, I’m not stressing about it for now.
- Then I wiped down the fixture REALLY well to remove sand dust and regular dust/dirt.
- I then applied the Rub’n Buff. This stuff is really easy to work with. I have found it works best for me to put on rubber gloves and use my finger to apply it.
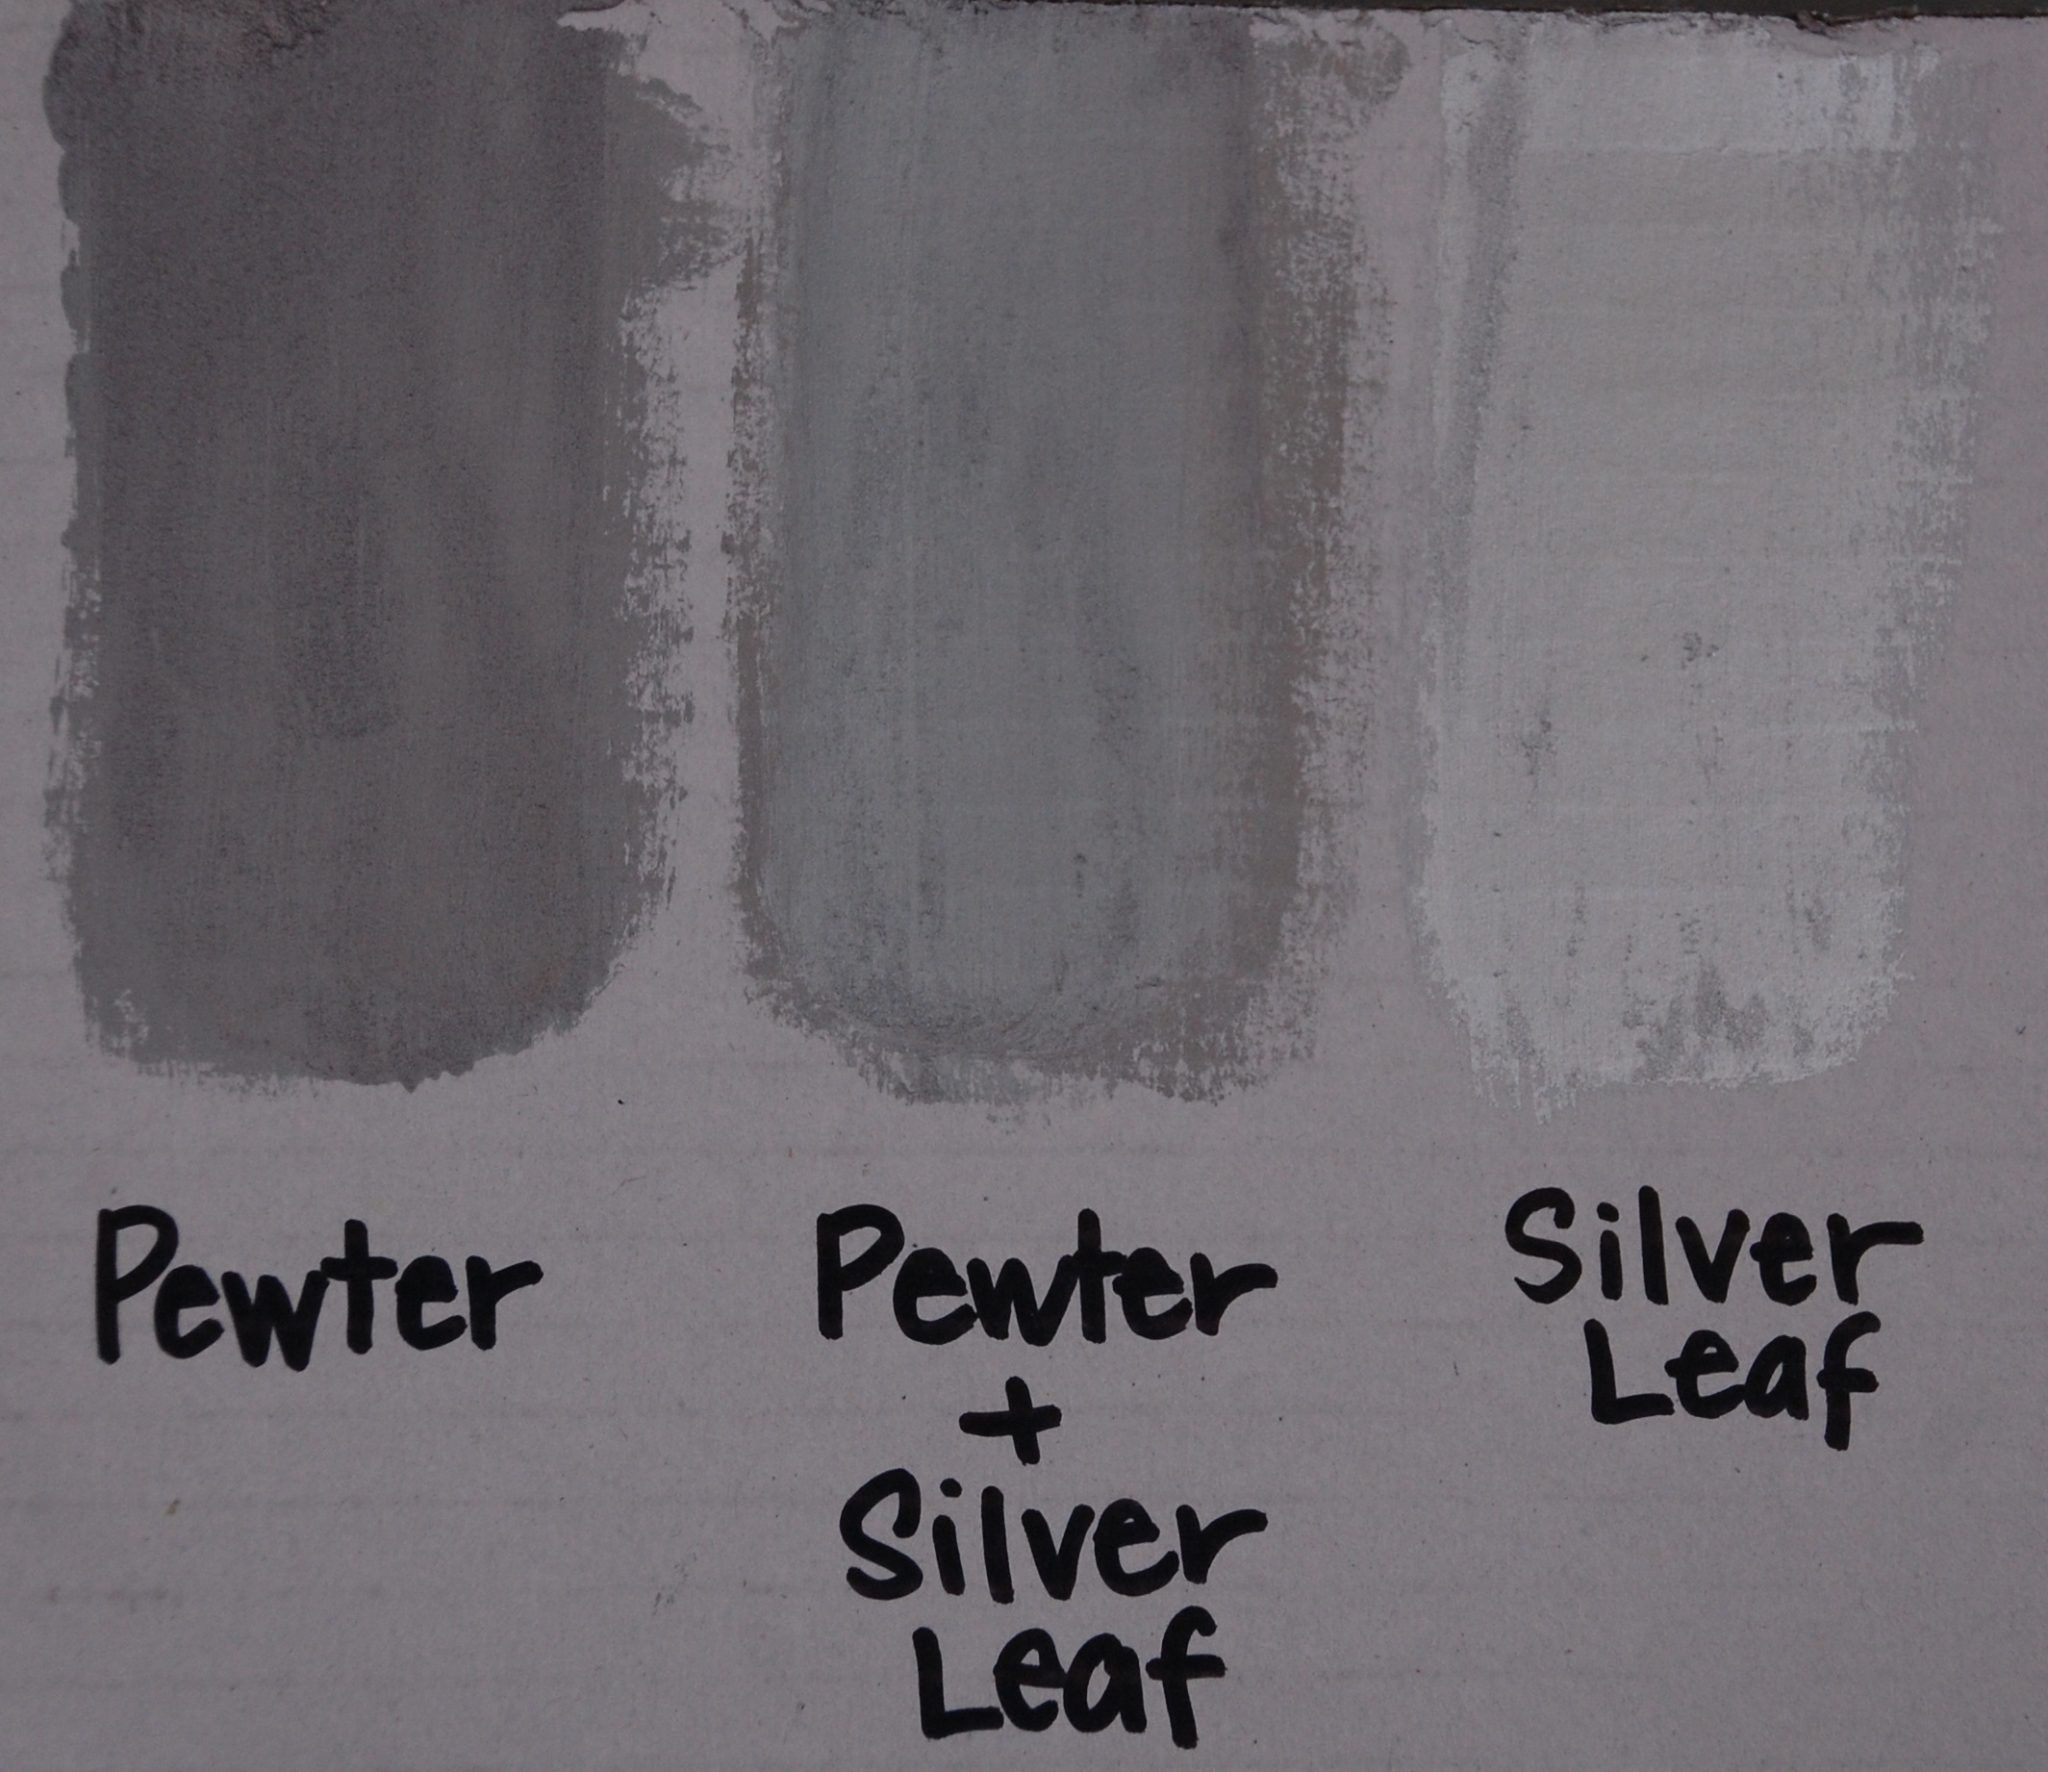
- I had some Silver Leaf Rub’n Buff, but knew that was too ‘silvery’ and bright for what I wanted. So I got some of the Pewter product. My Michael’s store has gold and silver, but I had to order the pewter from Amazon.
- I found that the Pewter was a little too dark, so then I went back over it lightly with some of the Silver Leaf. This time I used a toothbrush as I didn’t want a real complete coverage.
- I like the look of the silver over the pewter…it has a bit of a tin or galvanized steel look to it.
- I did buff the fixture after I was done, which is when I noticed that it rubbed off in the real smooth areas.
- What I would do differently next time: I would try a deglosser and/or prime the metal. There are 2 primers that I have used recently. XIM Primer and Rust-Oleum Clean Metal Primer. I’m pretty impressed with the XIM and the label states that it adheres to both ferrous and non-ferrous metals, so I’d probably give that a whirl first.

I did a little sample for you to see the difference between the pewter and the silver leaf, and the two together.
Thanks again for spending a few minutes of your busy day with me today.
Please know that I welcome each and every comment that comes my way. If you want to make sure you don’t miss future content, pop your email in the beige box up on the right or click here. I usually send out 2-3 emails a week, so I won’t inundate your inbox…believe me, I’m sensitive to an overflowing email inbox!
By subscribing to Nourish and Nestle, we will only use your email address to send you emails (no more than 2-3 per week) that will keep you up to date with the latest news and content on the site. In addition, you will have access to my growing library of knit & crochet patterns, as well as other printables. This library will continue to grow, so check back often.
And please know that you can unsubscribe at any time by emailing me or clicking on the “unsubscribe” link at the bottom of all of our emails.
You can access many of the products I refer to in all of my posts on my Nourish and Nestle Amazon Page. You can access it here.
So, if you’d like to get in on the ‘subscriber benefit’ action, simply subscribe to Nourish and Nestle here or using the form on the right sidebar. It’s towards the top a bit. I have sent all my subscribers the link to the Subscriber Benefits Library. If you missed it or misplaced it, drop me a line.
Until next time…
Hugs,

I have a new (name brand) shower curtain rod that rusted within a year. I returned the first one I had and the company sent me a new one. The second rod also rusted within a year. I didn’t want to have to remove it and start over again so I thought about Rub n Buff, as I had used it before for other projects. It is a wax product so I thought that it would work well in damp areas. My bathroom hardware is brushed nickel so I got a tube of the silver color. I rubbed it on without taking the rod down and, so far, I’ve had no more rust spots. It’s a great solution. Rub n Buff works for so many projects.
Hi Rita,
I had the same problem with bathroom fixtures getting little bits of rust and Rub n Buff worked great. Do pop back in and let us know how it holds up…I have since moved from that home, so can’t opine on how my fixtures are doing now. And not for nothing, wouldn’t you expect a shower rod to hold up to moisture? That’s rather disappointing that you have had that problem.
Have a great day, my friend.
Hugs,
Lynn
This is EXACTLY the post I was looking for. I just recently learned about this product on TikTok and it sounded like the answer to my bathroom light fixture color mismatch issue. I started searching and found this post! We changed out the fixtures and hardware on everything but the light in our bathroom when we did a bit of a facelift on it this summer. We took things from bronze to black. Not a huge difference, but one we notice. My husband did NOT change the light fixture and it has driven me crazy ever since.
Hi Dana,
I am so glad!That Rub n Buff is great stuff! But, hubby does need to finish the job! Right!?
Thank you so much for this post! It’s exactly what I was looking for. What did you use to sand the rust down? If normal sanding paper, what grit? Thanks!
Good morning Natascha,
I just used regular sand paper in a fine grit. Like I said, I would also go over the whole fixture with deglosser after sanding and then wipe it down well with rubbing alcohol before using the rub n buff.
Hope this helps!
I love your combination of the two silver hues…light and dark. It looks better than either on their own in my opinion. I discovered today that antique gold combined with ebony produced something close to antique brass. I was matching new door hinges to very old 1938 rim lock door knob fixtures that I stripped of paint. The result was passable and saved me a bundle.
Thanks Marie,
Is there an ebony rub n’ buff? That would be great!